Build a Slack activity dashboard with Metabase
Introduction

In this article, we will be leveraging Airbyte - an open-source data integration platform and Metabase - an open-source way for everyone in your company to ask questions and learn from data - to build the Slack activity dashboard above.
Airbyte provides us with a rich set of source connectors, and one of those is the Slack connector which allows us to get data off a Slack. We are going to use this connector to get the data of the Slack Workspace and copy them into a Postgres database destination. And then will connect Postgres database with Metabase in order to create the activity dashboard.
Pre-requisites:
Git
Docker
Docker Compose
Airbyte
Postgres Database
Metabase
Slack
Step 1: Replicating data from Slack to Postgres with Airbyte
Deploying Airbyte
There are several easy ways to deploy Airbyte, as listed here. For this tutorial, I will just use the Docker Compose method from my workstation:
```
$ git clone https://github.com/airbytehq/airbyte.git
$ cd airbyte
$ docker compose up -d
```
The above command will make the Airbyte app available on http://localhost:8000 .
Visit the URL on your favourite browser, and you should see Airbyte’s dashboard (if this is your first time, you will be prompted to enter your email to get started).
If you haven’t set Docker up, follow the instructions here to set it up on your machine.
Setting Up Airbyte’s Slack Source Connector
Airbyte’s Slack connector will give us access to the data. So, we are going to kick things off by setting this connector to be our data source in Airbyte’s web app. I am assuming you already have Airbyte and Docker set up on your local machine. We will be using Docker to create our PostgreSQL database container later on.
Now, let’s proceed. In Airbyte’s dashboard, on the left side of Menu, select “Sources” and click on the “New source” button.
In the next page “Select the type of source you want to connect” box, search for “Slack,” and then select it. Airbyte will then present the configuration fields needed for the Slack connector. So you should be seeing something like this on the Airbyte App:
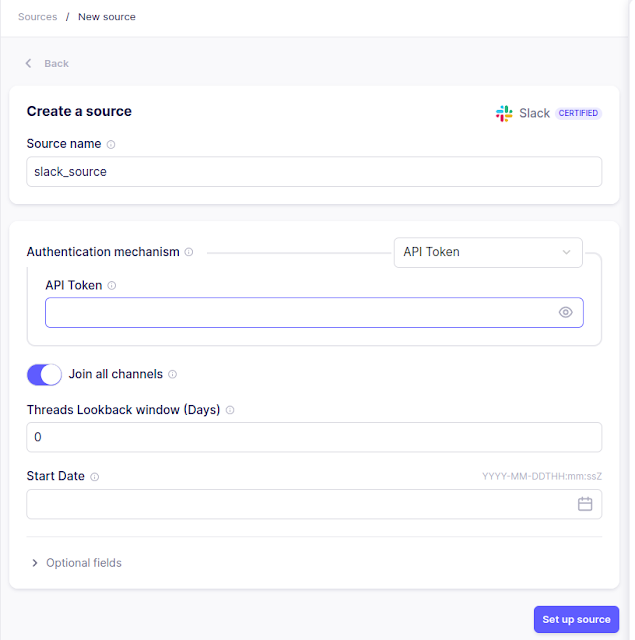 |
In the next page, enter a name for the source name as “slack-source”. And for API Token, the first thing you will notice is that this connector requires a Slack token. So, we have to obtain one. If you are not a workspace admin, you will need to ask for permission or for a demo purpose create your own workspace.
Let’s walk through how we would get the Slack token we need.
Assuming you are a workspace admin, open the Slack workspace and navigate to:
Workspace Name > Tools & settings > Customize workspace.
In my case, it will be cloudnativeculture > Tools & settings > Customize workspace (as shown below):

In the new page that opens up in your browser, you will then need to navigate to Configure apps on the left side of the panel.
In the new window that opens up, click on Build in the top right corner.

Click on the "Create New App" button and select “From Scratch”.

In the modal form that follows, give your “App Name”- you can name it “airbyte_metabase”, then select your workspace from the ”Pick a workspace to develop your app in”.


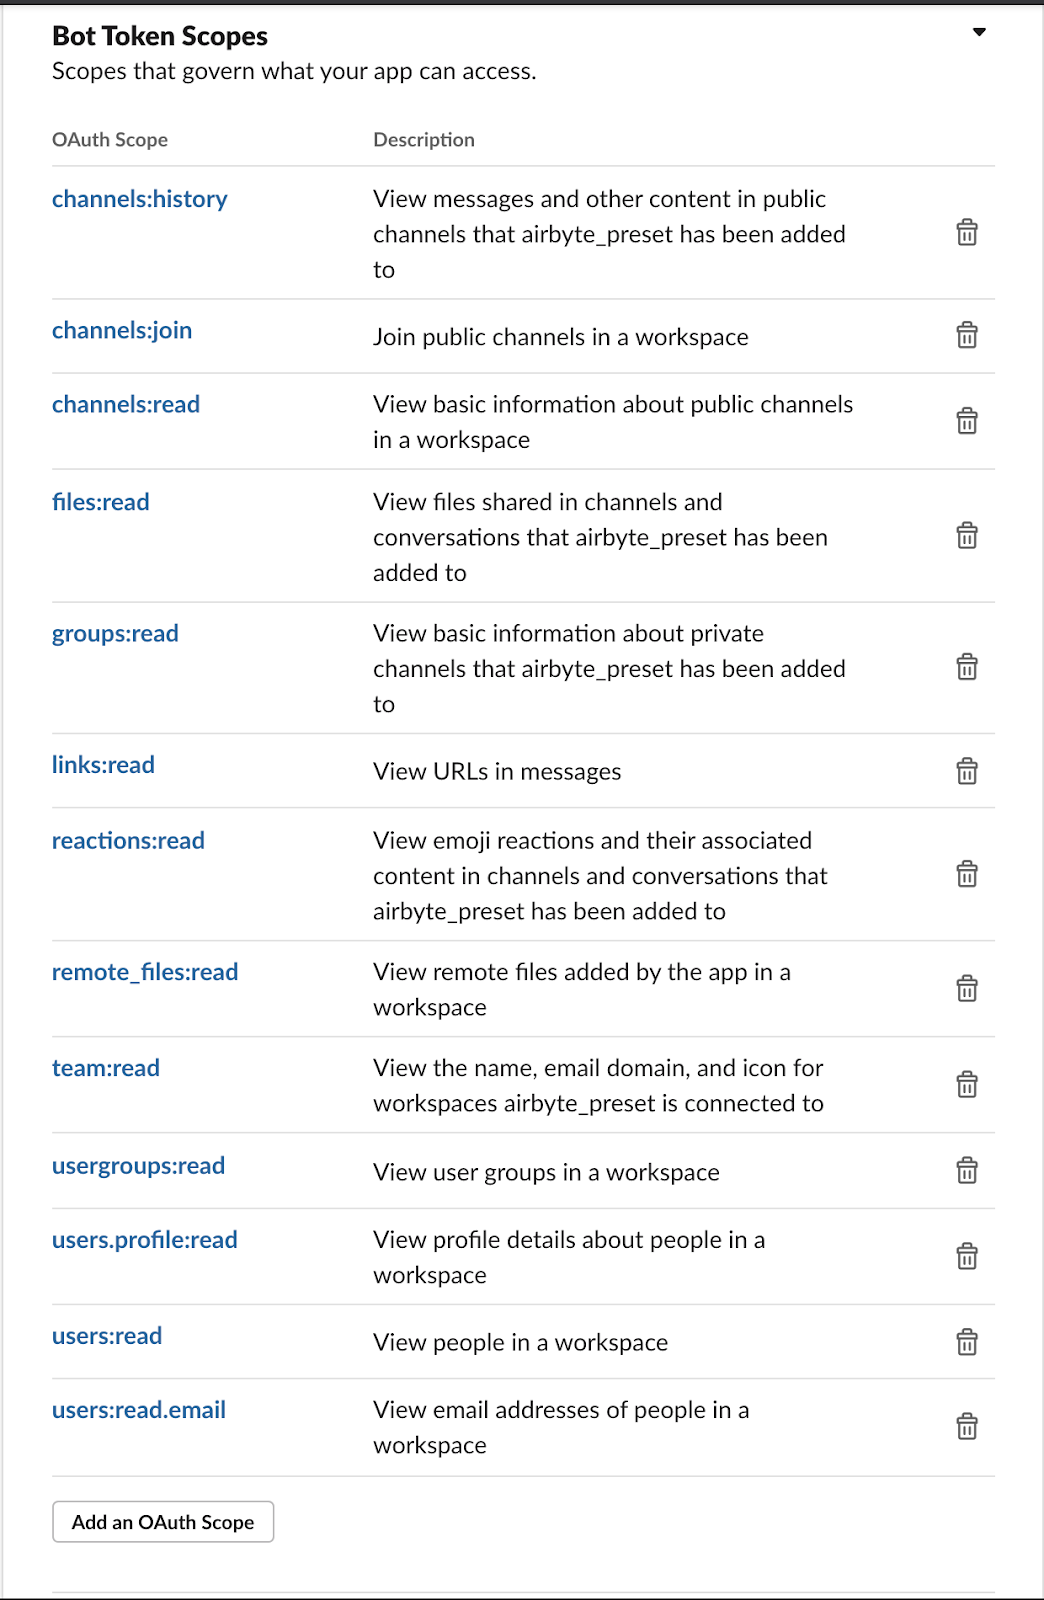
In the next screen, navigate to the Scopes section. Then, click on the Add an OAuth Scope button. This will allow you to add permission scopes for your app. At a minimum, your app should have the following permission scopes:
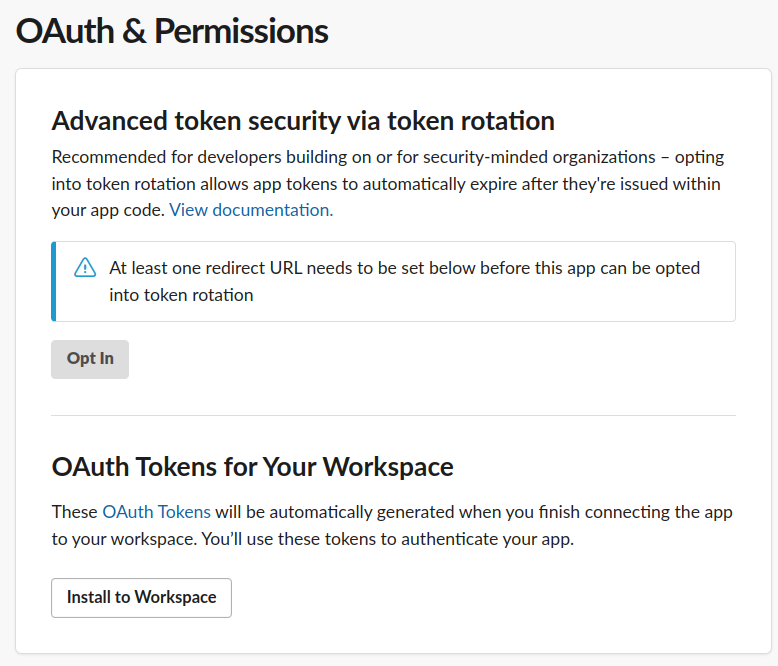
Then, we are going to add our created app to the workspace by going to the OAuth & Permission section and clicking the Install to Workspace button.
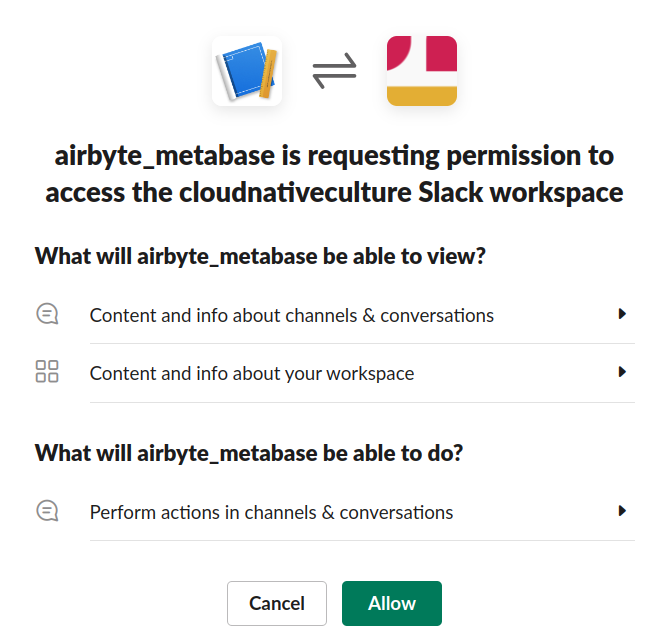
Slack will prompt you that your app is requesting permission to access your workspace of choice. Click Allow.
After the app has been successfully installed, you will be navigated to Slack’s dashboard, where you will see the Bot User OAuth Token in the OAuth & Permission section.
This is the token you will provide back on the Airbyte page, where we dropped off to obtain this token. So make sure to copy it and keep it in a safe place.
Now that we are done with obtaining a Slack token, let’s go back to the Airbyte page we dropped off and add the token in there.
We will also need to provide Airbyte with a "Start Date". This is the date from which we want Airbyte to start replicating data from the Slack API, and we define that in the format: YYYY-MM-DDT00:00:00Z.
We will specify ours as 2023-11-25T00:00:00Z and the form should look like this:
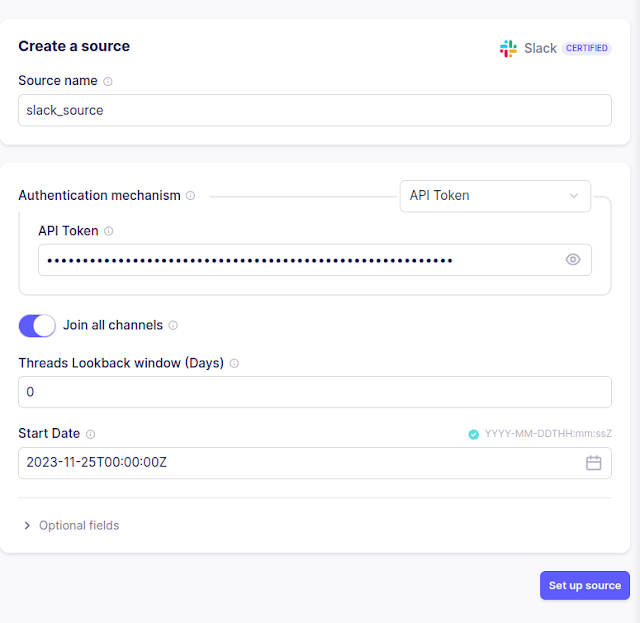
Finally, click on the Set up source button for Airbyte to set the Slack source up.
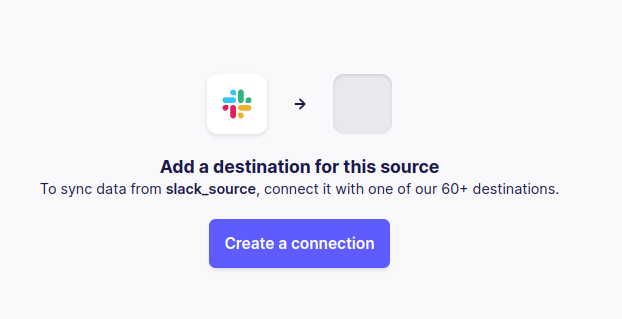
If the source was set up correctly, you will be taken to the destination section of Airbyte’s dashboard, where you will tell Airbyte where to store the replicated data.
Setting Up Airbyte’s Postgres Destination Connector
For our use case, we will be using PostgreSQL as the destination.
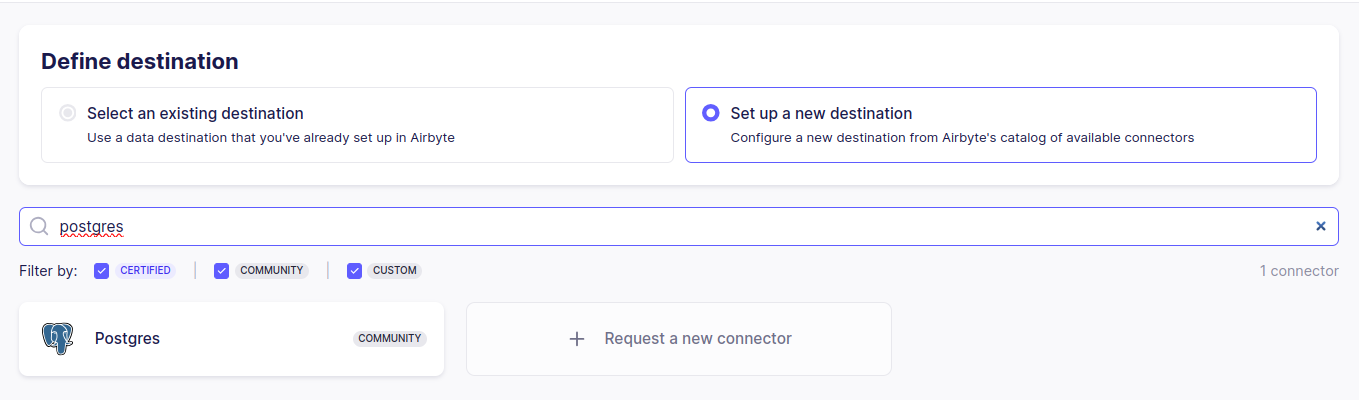
Click “Create a connection”, then select “Set up new destination” and search for “postgres” on the search bar and select it.
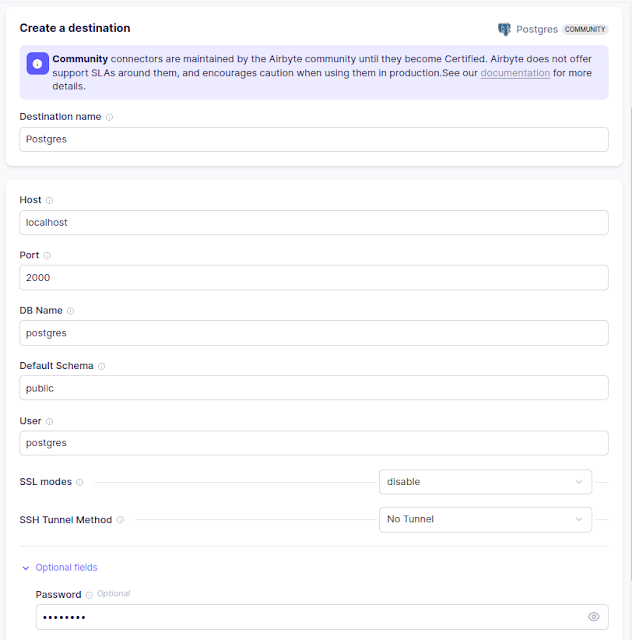
In the next screen, Airbyte will present you with a form to give your destination a name. We’ll call this destination "slack-destination". Then, we will select the Postgres destination type. Your screen should look like this now:
Great! We have a form to enter Postgres connection credentials, but we haven’t set up a Postgres database. Let’s do that!
Since we already have Docker installed, we can spin off a Postgres container with the following command in our terminal:
```
$ docker run --rm --name slack-db -e POSTGRES_PASSWORD=password -p 2000:5432 -d postgres
```
(Note that the Docker compose file for Superset ships with a Postgres database, as you can see here).
The above command will do the following:
create a Postgres container with the name slack-db,
set the database password to password,
expose the container’s port 5432, as our machine’s port 2000.
create a database name and a user, both called postgres.
With this, we can go back to the Airbyte screen and supply the information needed in the form. Your form should look like this:
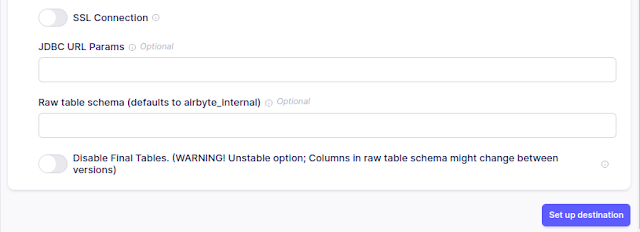
Then click on the Set up destination button.
Setting Up the Replication
You should now see the following screen:
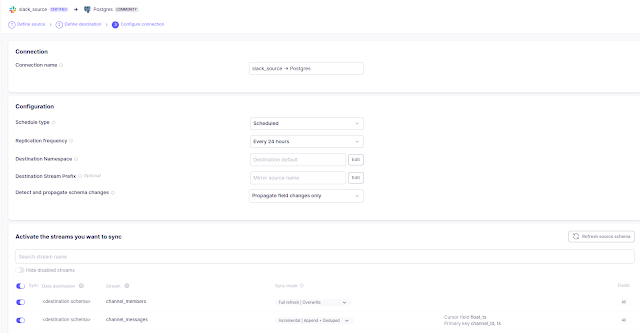
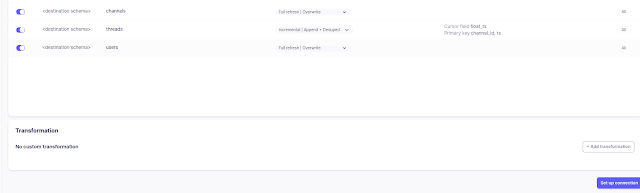
Airbyte will then fetch the schema for the data coming from the Slack API for your workspace. You should leave all boxes checked and then choose the sync frequency - this is the interval in which Airbyte will sync the data coming from your workspace. Let’s set the sync interval to every 24 hours.
Then click on the Set up connection button.
Airbyte will now take you to the destination dashboard, where you will see the destination you just set up. Click on it to see more details about this destination.
You will see Airbyte running the very first sync. Depending on the size of the data Airbyte is replicating, it might take a while before syncing is complete.
When it’s done, you will see the Running status change to Succeeded, and the size of the data Airbyte replicated as well as the number of records being stored on the Postgres database.

To test if the sync worked, run the following in your terminal. This should output the rows in the users’ table. To get the count of the users’ table as well, you can also run:
```
$ docker exec slack-db psql -U postgres -c “SELECT * FROM public.users;”
Now that we have the data from the Slack workspace in our Postgres destination, we will head on to creating the Slack dashboard with Metabase.
Step 2: Connecting the PostgreSQL database to Metabase
Installing Metabase
Metabase is an open source analytic tool that you can get started working with in a couple of ways; using the .jar file, installing it as a Mac app or using a Docker container.
For this tutorial we will be using Docker(you can alternatively look up the installation that suits you here). To do this, simply run:
```
$ docker run -d -p 3000:3000 --name metabase metabase/metabase
```
Go to : http://localhost:3000 and fill basic details like your information, your company information, select database as Postgres and finally attach database details as shown in below form.
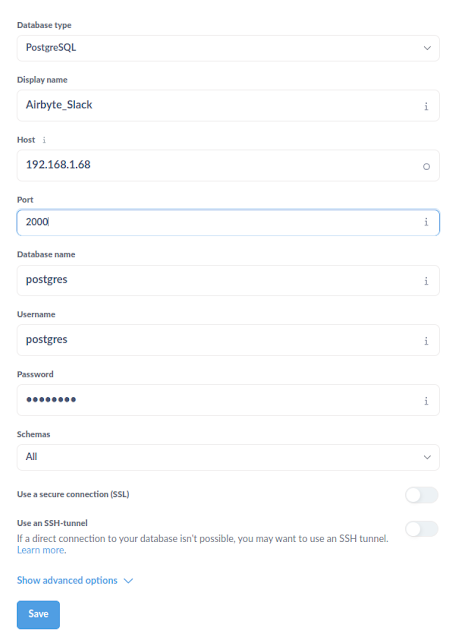
In order to add the database, click on the cog(settings) icon on the menu bar of the Metabase app and choose the Admin Setting to be taken to the admin view where we can add a database:
Click on the Add a database button and you will be presented with a form where you should select PostgreSQL as your database of choice and then fill out the connection parameters which will be the one for the PostgreSQL database we created to hold the data from Slack
Fill out the details to match the credentials of the PostgreSQL database we created earlier.
Afterwards, hit save when you are done entering the database credentials and your database would have been fully loaded onto Metabase ready for us to start creating our dashboard.
Step 3: Creating the dashboards in Metabase
Metabase is based on asking questions on your Data, so to build our Slack Dashboard we will be asking the following questions:
Total number of channels
Total number of users
Total number of threads
Total messages across channels
Users by name
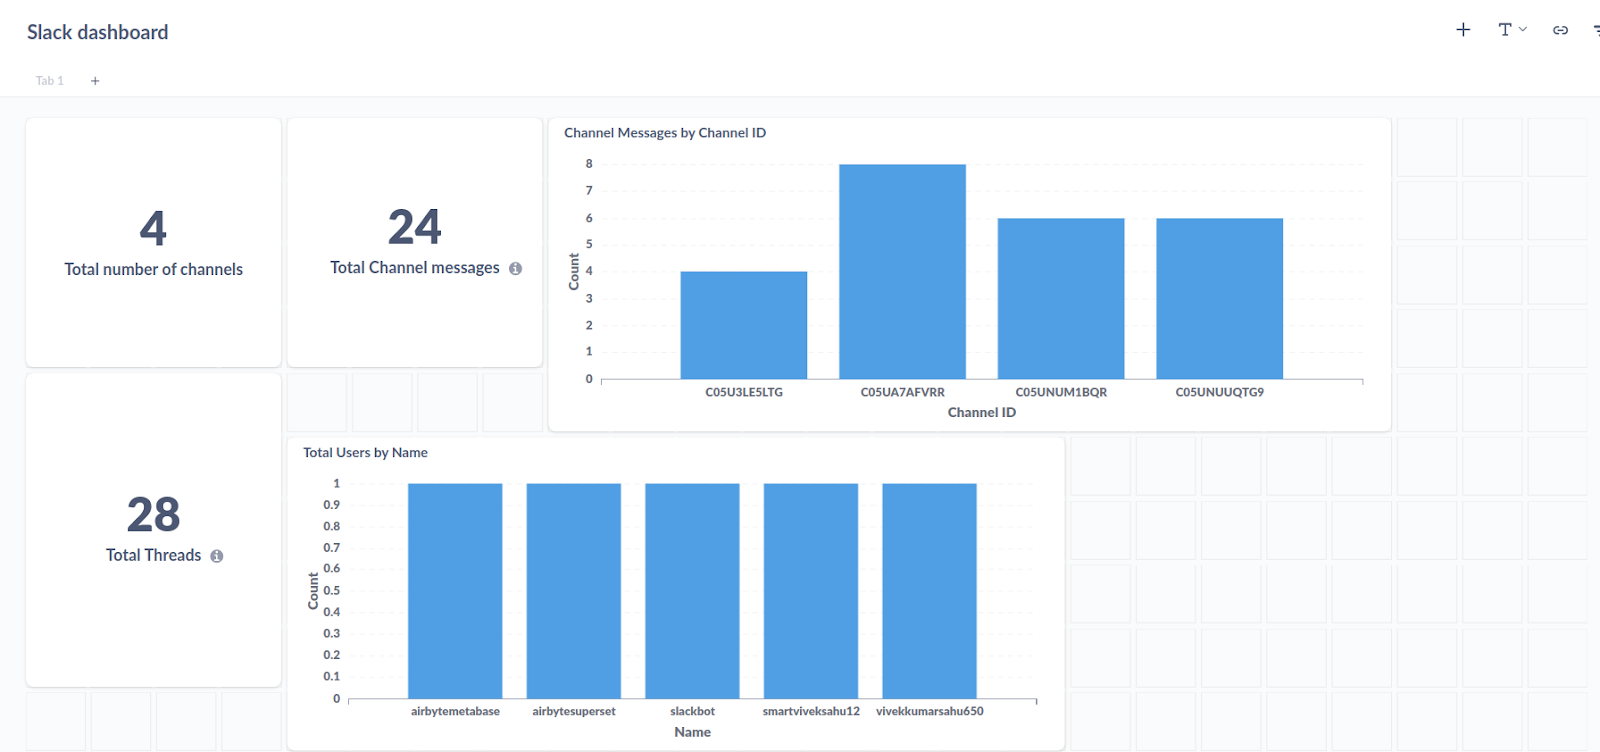
The Metabase dashboard looks as shown below:

Total Number of channels
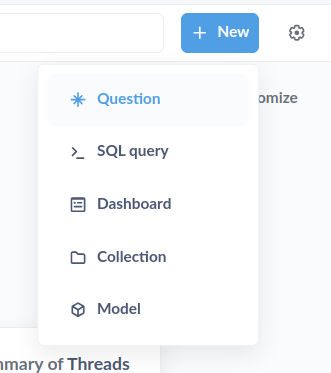
Metabase delivers an analysis based on your question such as “How many members in the channel”. For that click on the “+New” button on the right upward side and select Question.
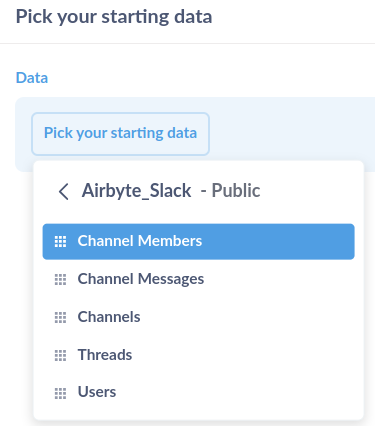
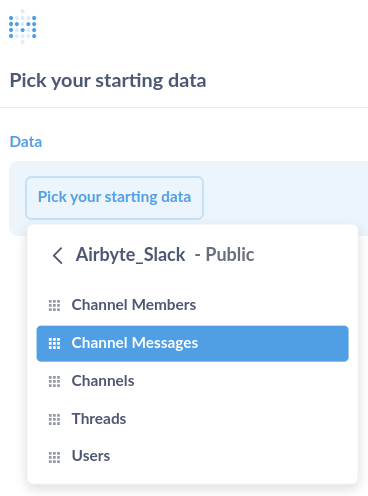
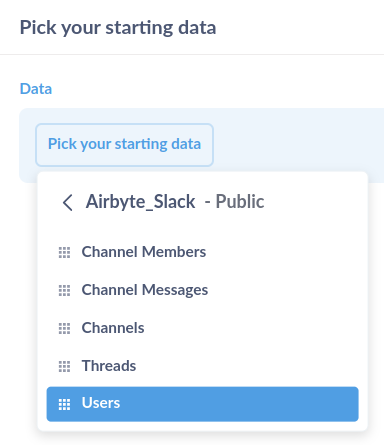
Then you choose the “Data” you want to work with. If everything is configured right, a data source called “Airbyte_Slack” should show up under “Pick your starting Data” and select “Airbyte_Slack” with the “Public” option and select “Channel Members”.
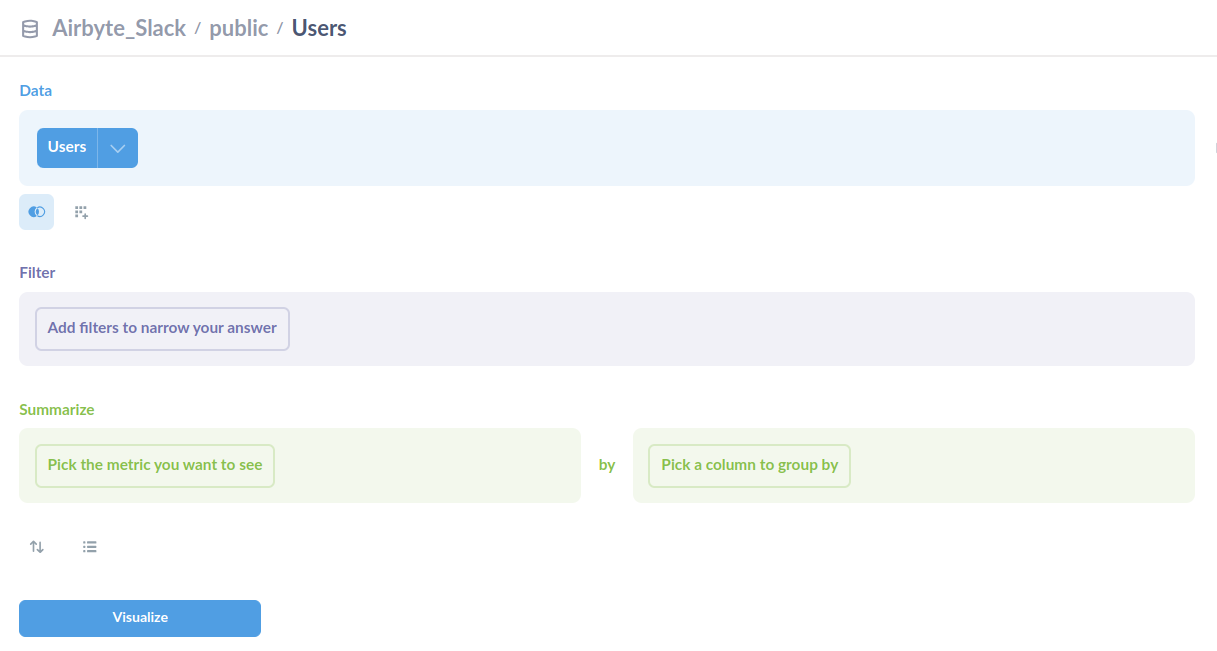
You will be landed on the next page, simply click on the “Visualize” button.
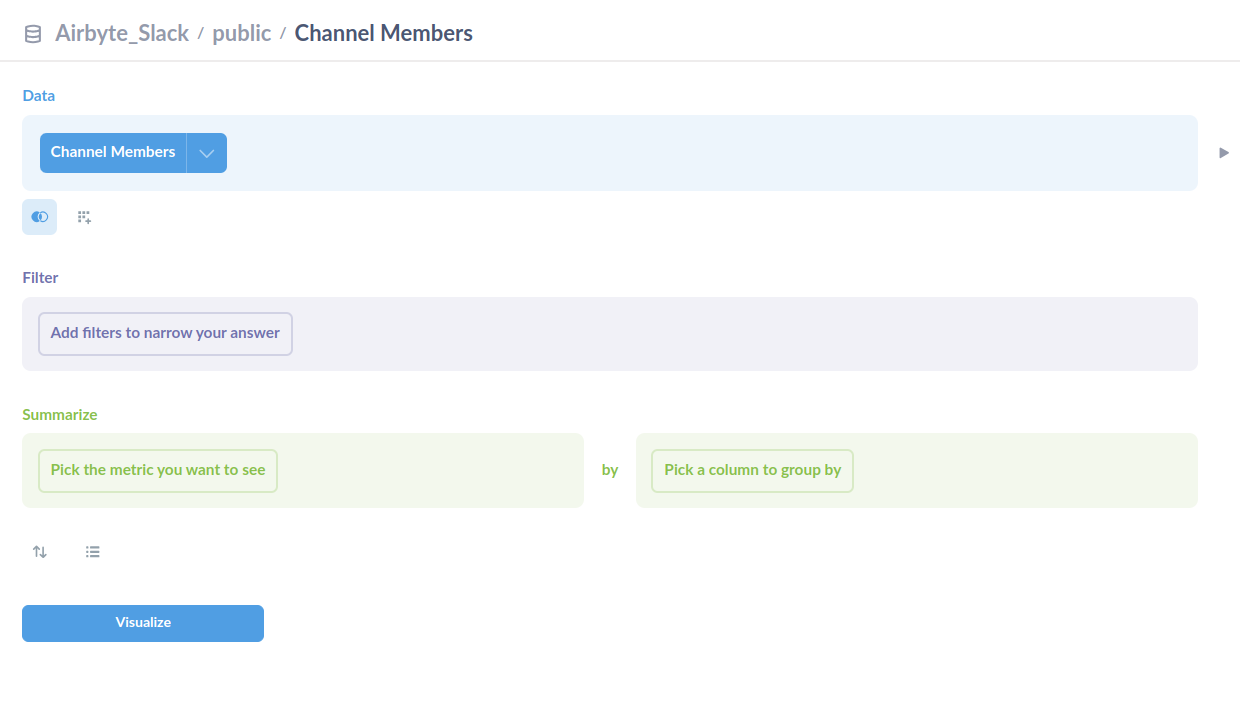
You will then see all the “Channel Members” data in the table chosen.
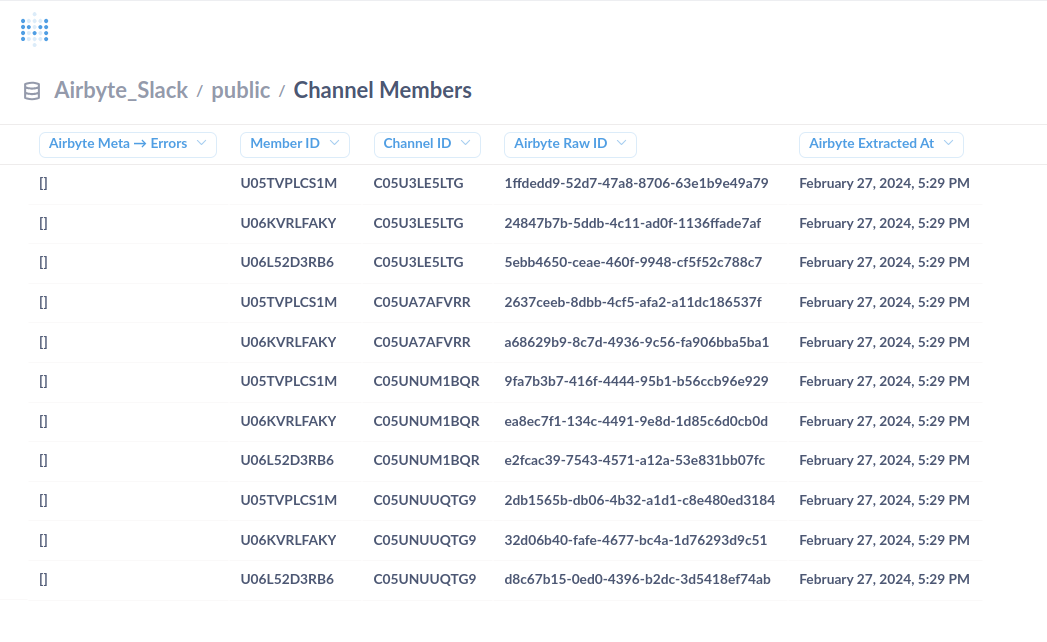
To compute the answer to our first question i.e. “total number of members in the channel”, hit the Summarize button and remove "Count" from "Summarize by" and click on “Add a Metric” and select “Number of distinct values of ….” and select “Channel ID”. This means total number of different and unique channel IDs means total number of channels.

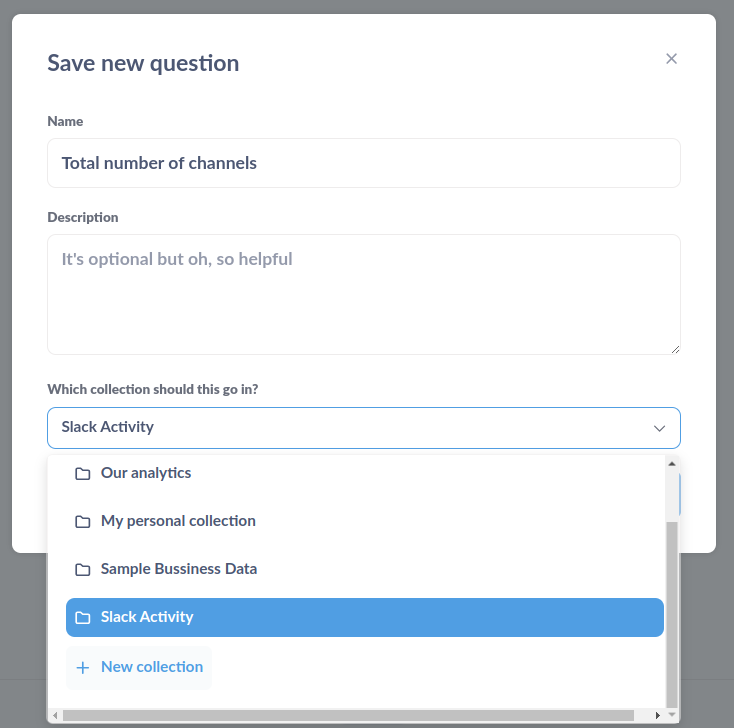
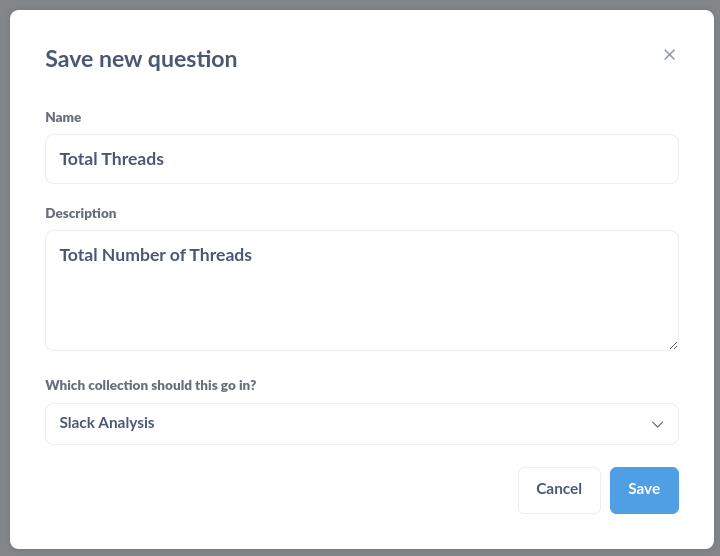
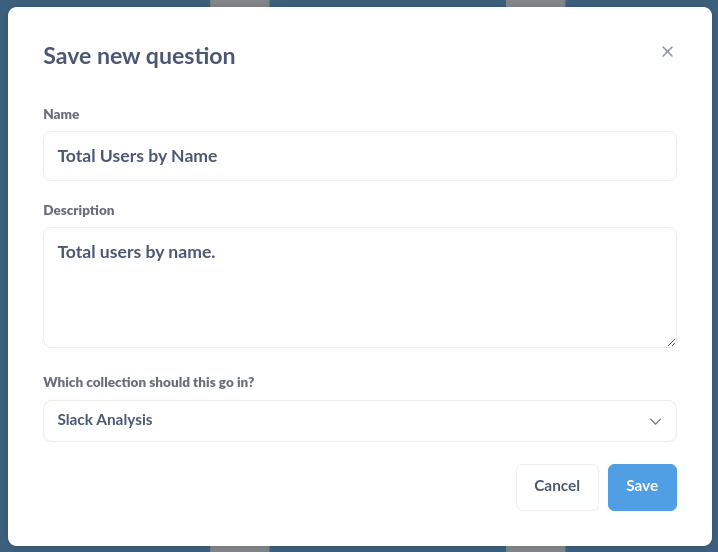
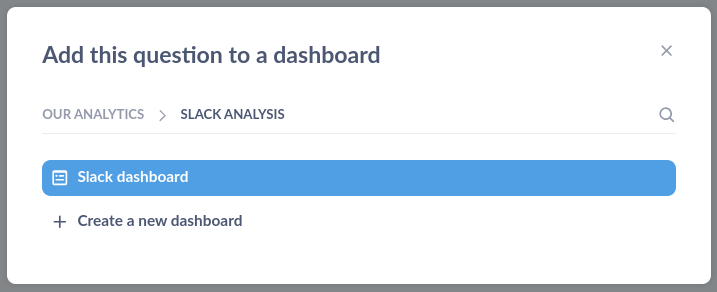
Now click on the Done button in the top down right. And followed by clicking on the Save button. And you will land on the page below to enter the name of your question as well in which collection this question to be placed on. In our case, the question is: “Total number of channels” and for collection, click on button “+New collection” to create a new collection for our dashboard. And from the next question we will select this newly created collection.
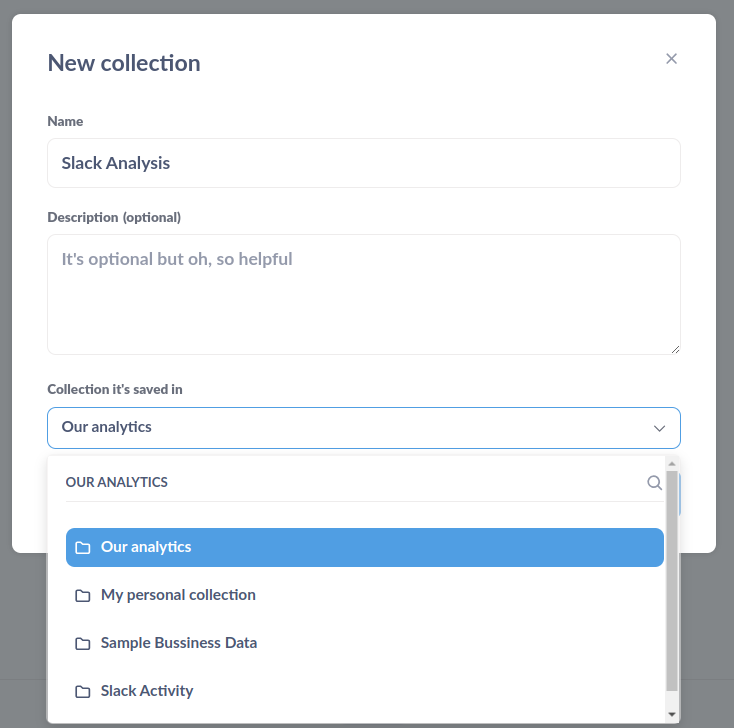
After clicking on the "+New collection" button you will land on New collection form to create a new collection. The name would be “Slack Analysis” and Collection to be saved on “Our analytics” and save it.
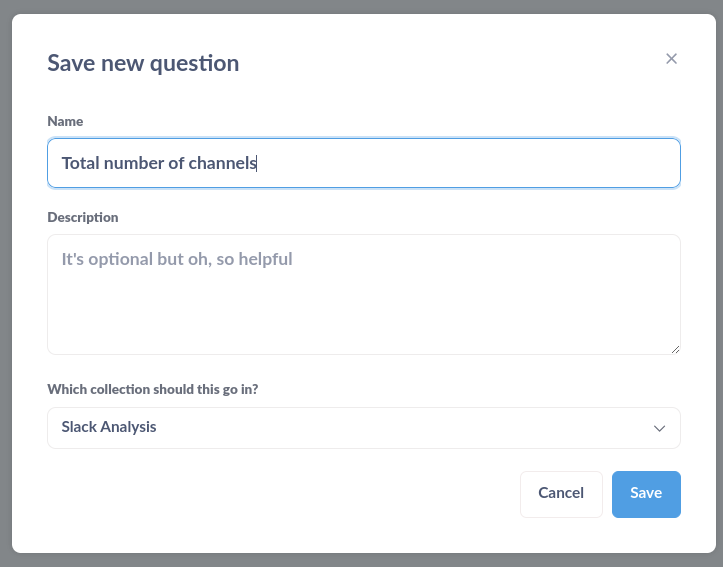
After creating new collection i.e. Slack Analysis now selects it as a collection for this question and all questions in near future.
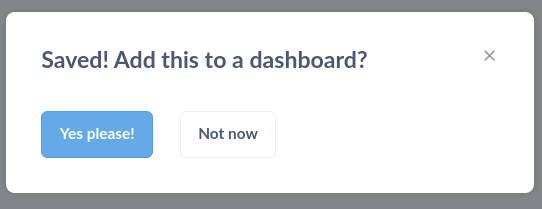
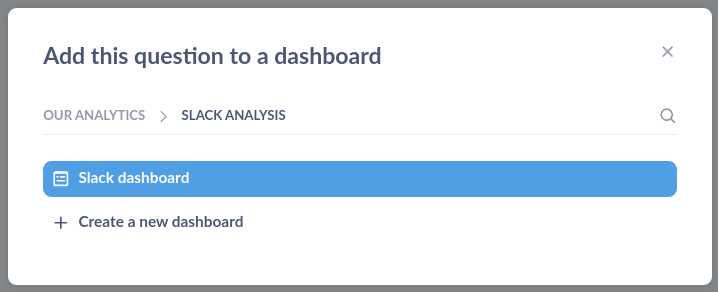
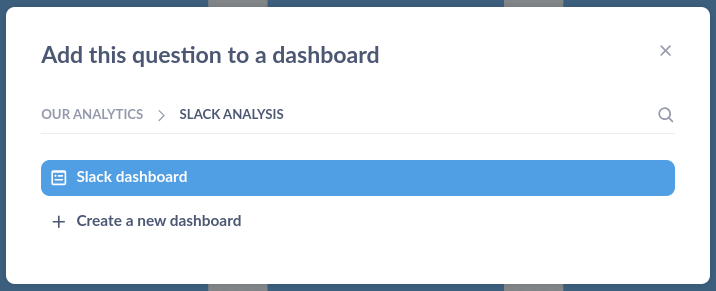
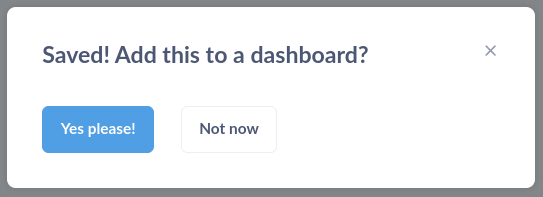
Now you need to add this to a dashboard, so select the “Yes Please!” button.
And create a new dashboard therefore click on button “+create a new dashboard”.
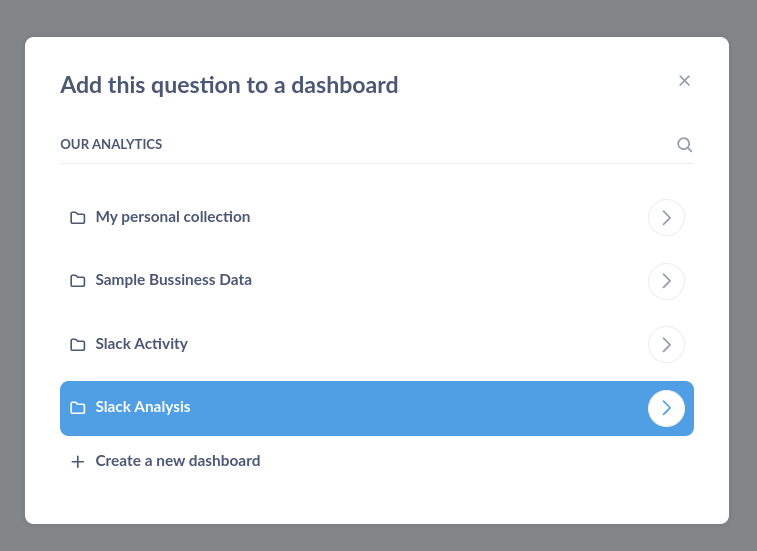
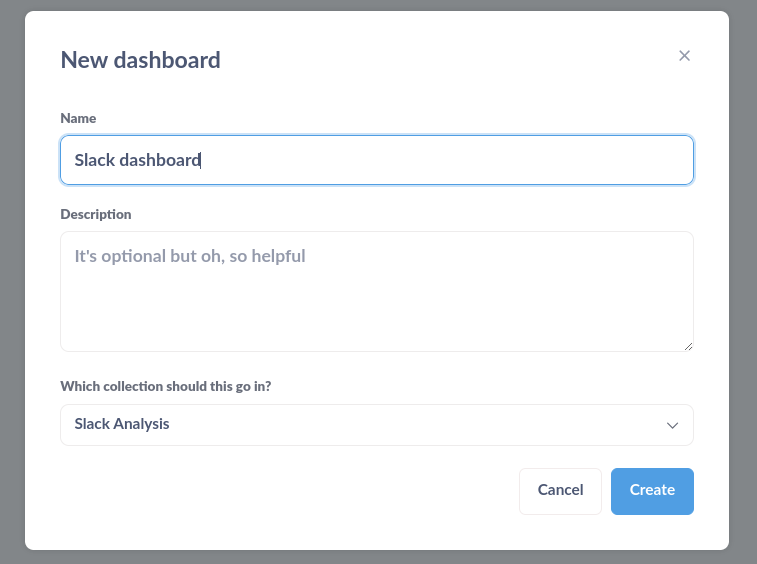
Create a new dashboard with the name “Slack dashboard” and placed it under “Slack Analysis”.
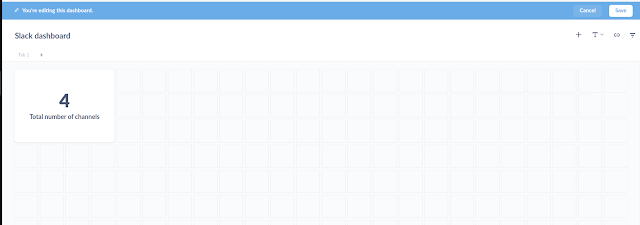
So, finally the first question is placed in your new dashboard. Click on Save button on right top. Similarly, all question we will place in this dashboard.
Total number of messages in all channels
Now the next question is to get the total number of messages across all channels. Click on the “+New” button on top right and select the question.

Pick the data from “Airbyte_Slack” and choose “Channel Message”
Simply click on the “Visualize” button.
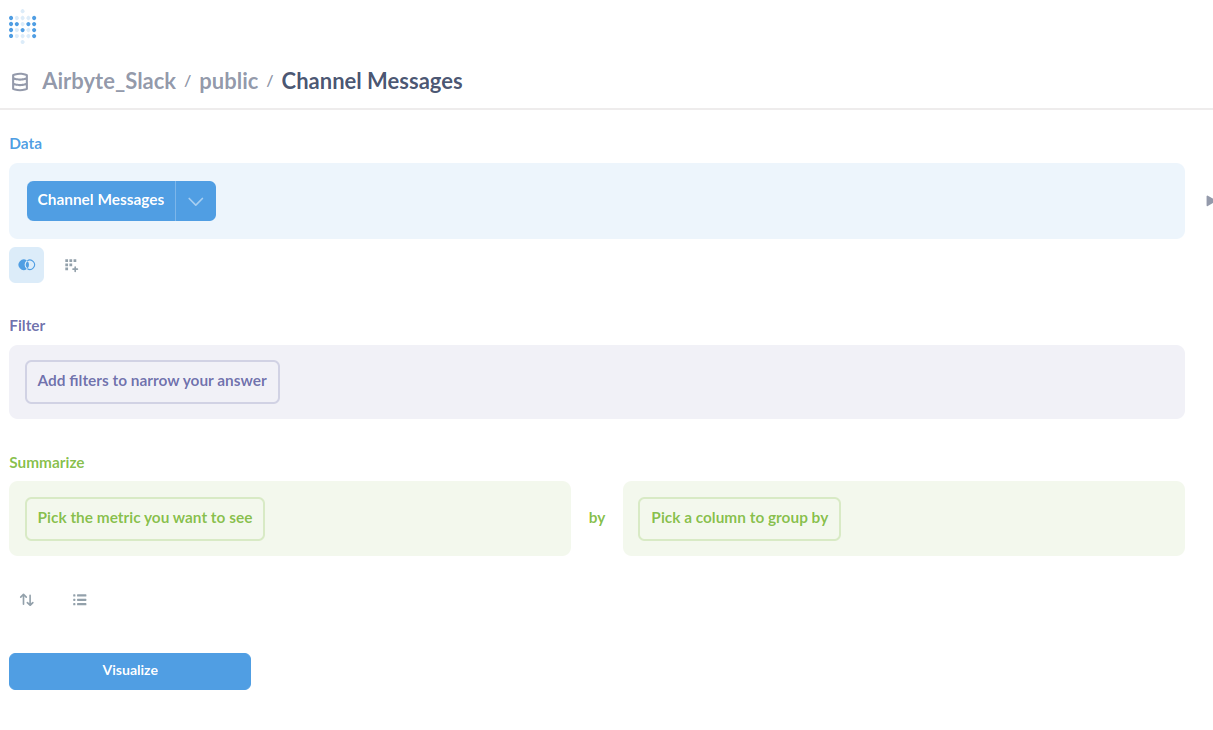
Click on the “Summarize” button. And choose Count as “Summarized by” and click on "Done" and then click on "Save" button.

After you click on the Save button you will be landed on a new page. Select as per shown below. And click on "Save" button.
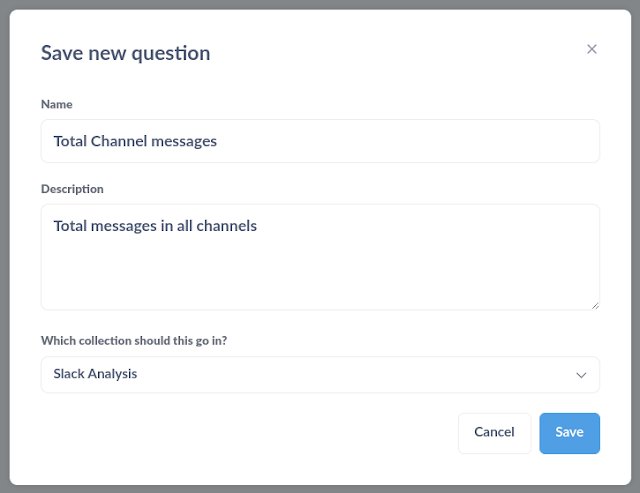
Similarly, save it to a dashboard that we created i.e. Slack dashboard.


You will be landed on the "Slack dashboard" and click on the Save button. And finally your second question is placed in this dashboard.

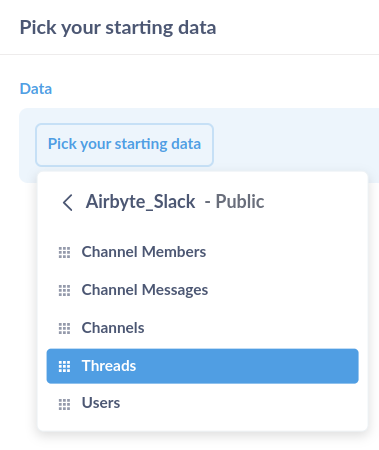
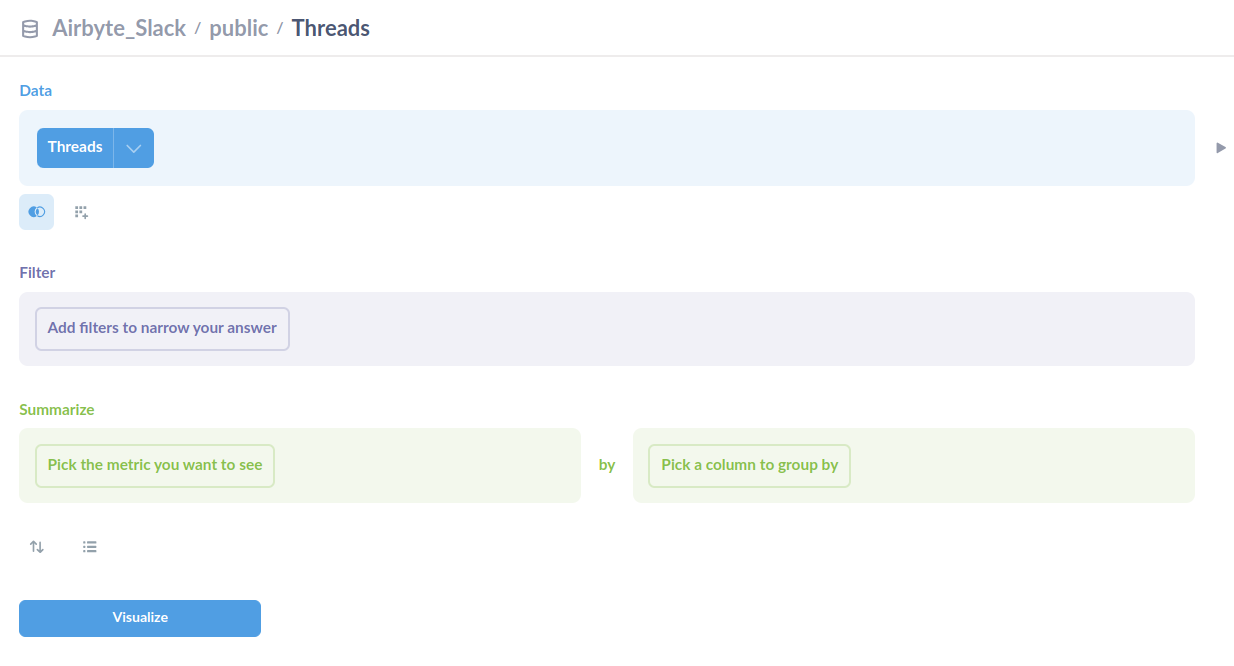
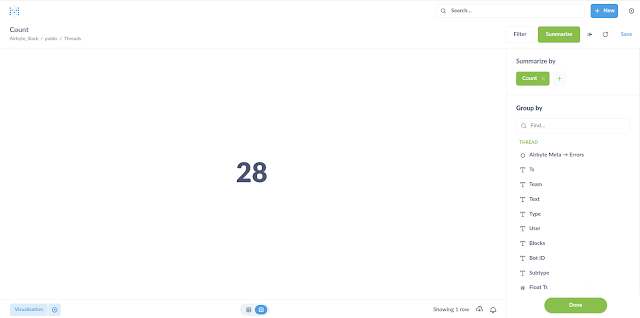
Total Threads
Similarly, for the total number of threads. You need to follow the same steps similar to the previous question. So will not repeat the same thing, just for your help attached the screenshot which is sufficient.


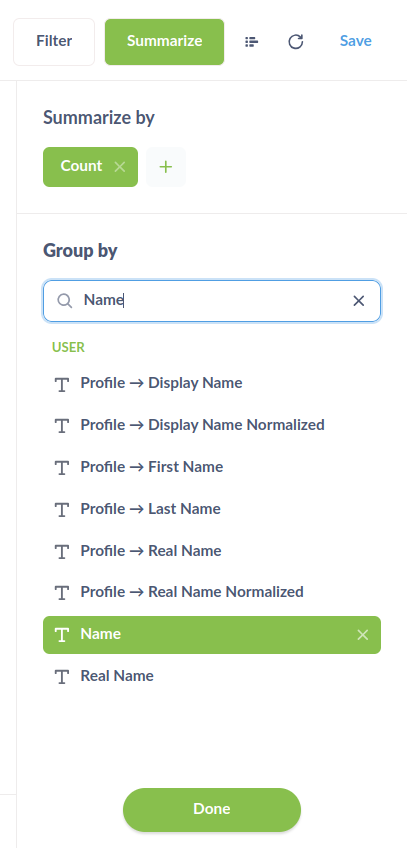
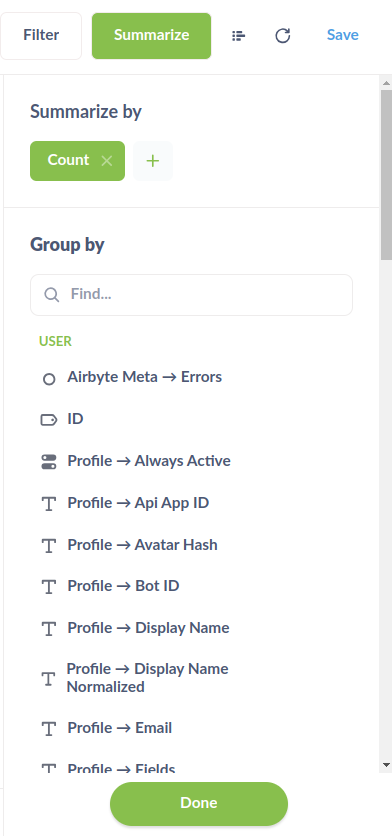
Count all users by name
“Summarized by” - “Count” and “Group by” - “Name”.

Count total number of users

Wrapping up.
In this article, we have worked through getting data from Slack workspace using the Slack Airbyte connector and storing that data in a PostgreSQL database. We then set up Metabase and asked questions to visualize the data.
Here is the finished Slack dashboard with our visualizations on Metabase:


Comments
Post a Comment